
Published February 26, 2021. Last Updated 4 years ago
Whether you homeschool or not, one question all parents must answer is, “What can I do with my child’s artwork?” Our mini Picassos and Frida Kahlos churn out reams of beautiful masterpieces each year, which can quickly turn into overwhelming art mountains if we don’t stay on top of it. Here are some of my favorite solutions for the perennials kids art storage dilemma.
How my family stored kids art when I was a kid
Long, long ago, when I was a child, minimalism wasn’t a thing. Or at least, my family had never heard of it. The terms paperless and decluttering would have sounded completely foreign to us.
Each year, I filled binders and notebooks–oh, so many notebooks–with my precious creative endeavours. Over time, these mementos filled my bedroom, our hallway closet, our fridge, our dining table, and our storage locker.
Some years after I graduated high school, I even had a childhood friend’s mom return a box of my schoolwork and mementos that had been left at her house.
When my mom downsized her apartment, she still had boxes full of my old work that needed to be sorted. I went over and sifted through it all, picking out a few things that actually had emotional significance to me.
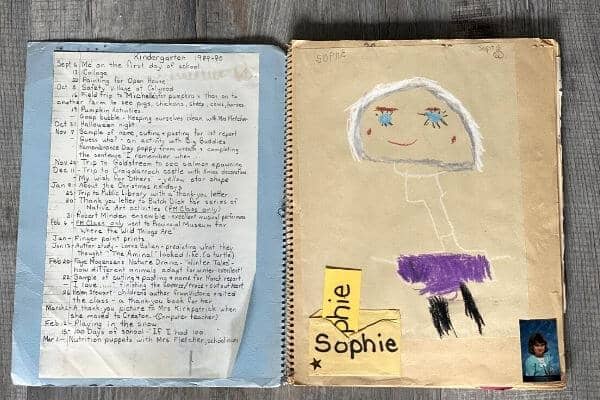
Here’s what I kept: my kindergarten scrapbook and one shoebox full of my geometric designs, my favorite essays, some report cards and transcripts, and a few short stories I wrote in elementary school.
Everything else, all of that stuff she’d held onto for years, ended up in the recycling bin.
Storage Ideas for Your Whole House: Get Organized with these Quick Tips
Making the Choice to Organize My Kids’ Art
So, not long after, when my own kids started preschool and my house began filling up with piles of their masterpieces, I decided to find a better solution for my kids’ art storage.
I wanted to honor and celebrate every beautiful thing they made, but I also knew I didn’t want to cart it around for twenty years only to have them dump it all in the recycling bin.
So, I started trying out different methods of storing it. Binders, scrapbooks, bins. I turned our living room into a personal art gallery with rotating exhibits.

I even started an art event for our homeschool community so all the kids could show off their creations together.
It’s been a long process of continually improving the ways we display and archive our kids’ art, but I think we’ve finally found a system that works for us.
In this post, I’m going to share all of the methods we’ve tried, not just the final solution. I know that the art storage solution that works best for our family may not be the one that works best for yours.
I’ll share the pros and cons of each method so you have a better idea of what you’re getting into.
I should warn you though: on the spectrum of Hoarders to Marie Kondo, I definitely err on the Marie Kondo side. At the end of the day, I probably recycle 90-95% of the art my kids make after I’ve documented it. I’m the kind of person who didn’t even keep their own yearbooks.
So, if you lean more towards the better to keep it for now than regret it later philosophy, you may want to stick with a method that doesn’t limit how much you can keep. Or, like me, you may end up combining two or more strategies to find the best way to preserve your kids artwork.
How Much Artwork and Schoolwork Should I Save?
You might be wondering just how many artifacts of your kids’ childhoods you should be holding onto and what exactly is worth saving.
I think this really depends on a number of factors:
- How many kids do you have?
- How much stuff do they produce?
- How much space do you have?
- How sentimental are you?
- How sentimental are your children?
- Do you enjoy pulling out memorabilia and taking a stroll down memory lane every once in a while or do the things you save just gather dust?
- What memories are most important to your children? Their artwork? Schoolwork? Report cards? Photos from favorite events and field trips? Keepsakes, such as ticket stubs, theatre programs, sport awards, or DVDs of their major events and accomplishments?
Take a few moments to think through your answers to these questions and, if appropriate, discuss them with your children. Their thoughts on what you should keep may be very different to your own, and as it’s their work we’re talking about archiving, their opinions count.
In our home, as I mentioned, we keep very little of the actual artwork these days. All of my kids have a sketchbook on the go at any given time. (Though recently they’ve gotten more into digital drawing and their sketchbooks have been a little neglected).

When my teenage daughters draw now, they spend hours working on a detailed drawing that I wouldn’t dare throw away. They keep their own sketchbooks in their room until they are full.
When they finish them, we go through them together and decide which ones to keep and how we want to preserve them. The sketches we save are stored in several of the methods described below–in a box for a couple of months, then hung, scrapbooked and/or added to a photobook.
Our younger kids produce a much larger quantity of art and other schoolwork, but obviously the quality is not the same. Most of my preschooler’s masterpieces are a single stroke of pen across a page (sorry, forests.)
So, while we still want to keep some of the art they create for posterity, most of it we just display for a little while, photograph for an artbook, and then recycle.
The amount and nature of what you keep will depend on your family and the factors above. At a minimum, I recommend keeping things that show progress, things they are particularly proud of, projects they worked hard on, and anything else that has special memories attached to it.
7 Common Decluttering and Organizing Mistakes – and How to Avoid Them
Pro Tips for Storing Your Kids’ School Work and Artwork
No matter which method you choose for storing your children’s school work and artwork, there are few tips you’ll want to keep in mind to keep the process relatively pain-free.
#1. Choose a method and stick with it for a year
In the next section, I’m going to recommend my seven favorite ways to store kids’ art, school work, and other memorabilia. While it may be tempting to try all of them at once, I urge you to come up with a process you think will work with you and stick with it for one year.
Your process may include more than one of the steps below–ours does–but having a plan and actually sticking to it is what makes this work.
If you’ve got some art in a scrapbook, others in a binder, a few in a box, and a random mix in a Chatbook, you’re not going to feel any more organized than you do now. Know your process, follow it wholeheartedly, then adapt as necessary.
#2. Keep on top of it
Have a system for dealing with accumulated art, projects, and schoolwork each day or week.
I use small bins to sort them temporarily so I can pick out my favorites later on. (After all, every piece of artwork is my favorite the moment I receive it. I have to see it in context to know which ones are really worth keeping forever. )
Be liberal about tossing out a lot of things right away.
#3. Put names and dates on everything
Make sure everything has a name and a date. I like using a date stamp so it’s really easy (and fun!) for kids to add the date themselves. (link)
#4. Include your kids in the process
As I mentioned before, your kids will probably appreciate being included in the process.
If they’re old enough to notice their artwork missing, be sure to give them a heads up. Have a process in place for how you’re going to handle it on a regular basis and explain the process to them.
Go through the projects together and decide what is special and worth keeping and what you can let go of.
What Can I Do with My Child’s Artwork?
Here are my top seven recommendations for storing, preserving and displaying your children’s art, schoolwork, and childhood memories.
1. Plastic Bins

How to store kids’ artwork in plastic bins
Plastic bins are one of the easiest ways to store kids’ art. You just buy some bins, label them, and stick the art in. Easy-peasy.
Options include having just one bin per child or having one pin per child per year.
Some people use a plastic filing folder system and others literally just dump the keepsakes in the bin to be sorted at a later date.
Pros
- Bins are super easy and cheap
- You can store more than just paper (i.e. 3D projects and keepsakes).
- The storage system is easily expandable. You can keep adding bins as needed.
Cons
- Because it’s easy to scale, you may end up keeping too much; nobody wants to tote everything they’ve ever created around with them the rest of their lives.
- The bins can take up a lot of space if you have multiple kids with several bins each. If you have more than a couple kids, you might want to limit yourself to one filing tote per child.
Product recommendations
2. Scrapbook
How to store kids artwork in a scrapbook
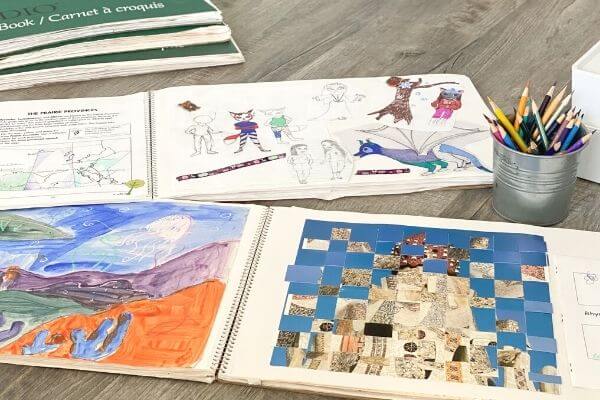
For the first several years of preschool and homeschooling, I made one scrapbook, per child, per year. These weren’t your fancy-type scrapbooks with colorful backgrounds, borders, stickers, and embellishments.
Rather, they were modelled after what I received at the end of kindergarten: a simple, oversized sketchbook filled with some of my best memories from the year.
Scrapbooks can be intimidating if you worry too much about making them beautiful. Trust me, just having a record of your kids’ education to look back on will be beautiful enough. We absolutely love looking through our old scrapbooks and reliving the memories of our early homeschooling years.
I like to use the really large sketchpads (like 12”x18” or 18”x24”) so I can fit lots of cool artwork on each page, but any sketchbook or scrapbook will do.
Pros
- The scrapbooks look really nice and make a special keepsake
- Sketchbooks are super affordable, making the system scalable.
- You can fit oversized artwork, including multi-page documents or even small Hilroy notebooks.
Cons
- Putting together scrapbooks is time consuming! You will want to trim down the artwork to make the most of each page and this can really add up.
- Can become overwhelming if you don’t stay on top of it regularly. (See Pro Tips 2 and 3 to avoid overwhelm.)
- Can take up a significant amount of space over the years.
- Pages will start to age with time.
- Can’t store 3D keepsakes.
Product recommendations
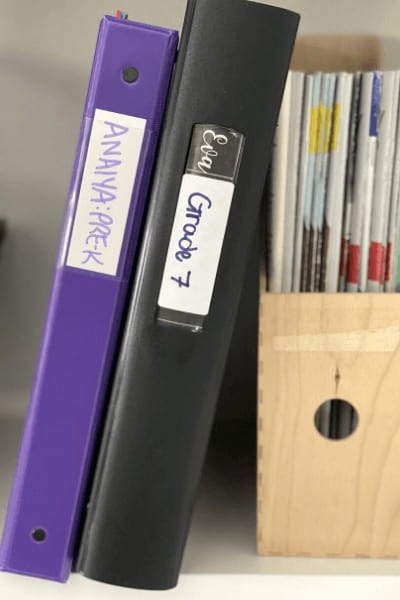
3. Binders or Art Portfolios
How to Organize an Artwork Portfolio Binder for Your Kids
This was one of the first artwork storage options suggested to me when my kids were younger. It’s time-tested and simple to implement.
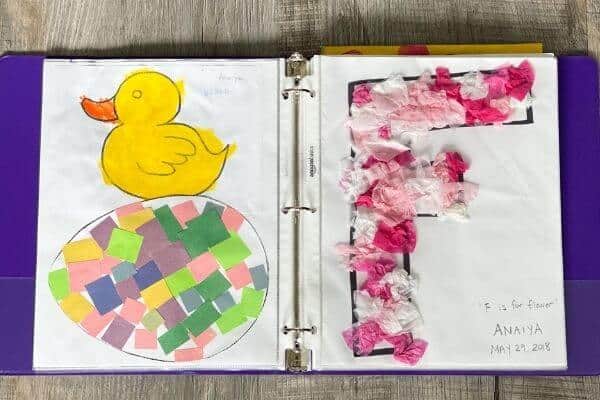
All you need is one binder per kid per year to store the highlights from their art and school work. If you use a larger binder and you’re more of a minimalist, you might even be able to get away with just one binder per kid, though that’s never worked for me.
Using sheet protectors is optional, but it does help preserve the artwork better and eliminates the need to punch holes in the papers themselves. Also, sheet protectors allow you to store smaller pieces of paper or large ones folded up.
Pros
- Easy to put together, can just add to the binder as art is produced.
- Cheap and scalable.
- Can look nice on a shelf if the binders are decorated or are all the same color.
Cons
- Can start to take up a lot of space if you multiple kids.
- Could look unattractive if the binders don’t have a cohesive look.
- Can be time consuming to assemble if you don’t stay on top of it (are you noticing a trend here?)
Recommended Products
4. Hang it
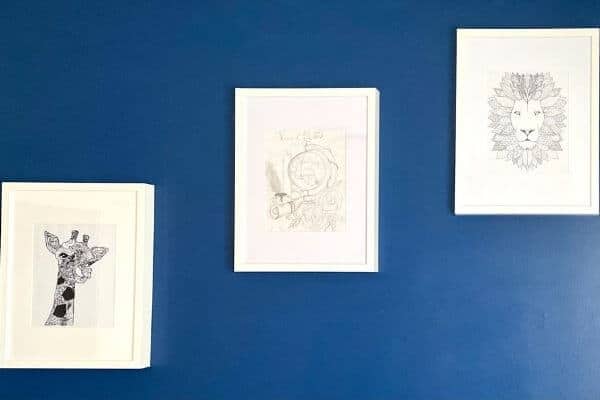
How to Hang Kids Art at Home
Another excellent option is to display your children’s art throughout your home.
There are so many benefits to doing so: it makes your kids feel like their work is valued and cherished, it inspires them to create more art, it gives your home a unique and special vibe, and it opens up conversations with visitors.
We’ve always had a number of our kids’ projects on display throughout our house. Whether it was paintings they did on canvases, framed sketches, 3D models, or watercolor paintings stuck on the fridge with a magnet, we’re usually surrounded by their art.
You don’t necessarily need to frame the art to hang it up, though framing it is fun too. You can create a neat display using twine and clothespins and let your kids choose what they want to hang up on it and how often they want to switch out the art.
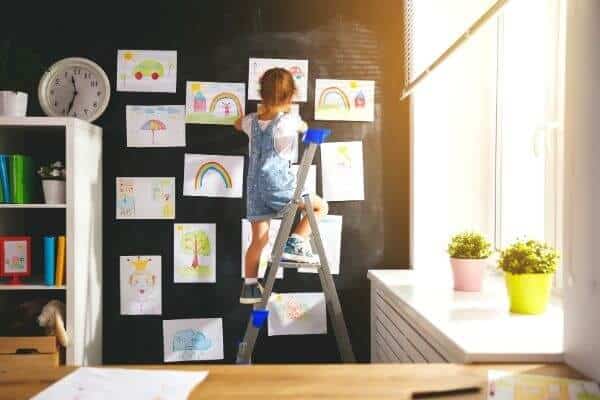
You could also give them a certain section of a wall that is theirs to display whatever art they want in.
Our whole family has A-Type personalities, so we tend to want a more cohesive look. We’ll pick five or six drawings that have a similar theme or style and make a gallery wall out of them. Or we’ll frame a series of bold colored paintings and hang them up as the focal art pieces in our living or dining rooms. Again, great conversation starters!
Don’t forget your kids’ bedroom walls! Those are the perfect spaces to hang up their art and really give their rooms a personalized feel.
While this solution should definitely be part of your strategy, it’s not a complete strategy in itself as you certainly can’t hang everything you want to keep. It’s best if you incorporate this with one of the other strategies.
Pros
- Great short term solution; allows you to appreciate the most special art pieces for a few weeks, months, or even years.
- Makes your kids feel special.
- Personalizes your home.
- Inspires conversations with visitors.
- Saves you from having to spend lots of money on expensive art. Who needs expensive art when you’ve got a home full of little artists?
Cons
- You can only hang so much of it at a time.
- It’s not a great long-term solution and doesn’t create the best opportunity for looking back on years’ worth of memories down the road.
Product Recommendations
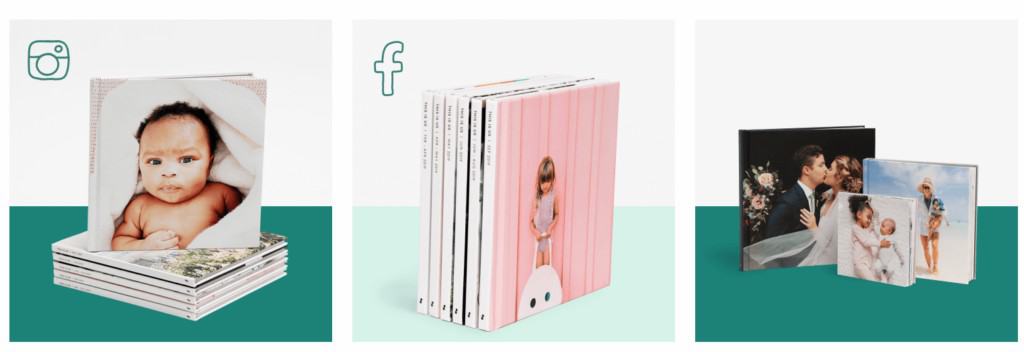
5. Make a Photo Book
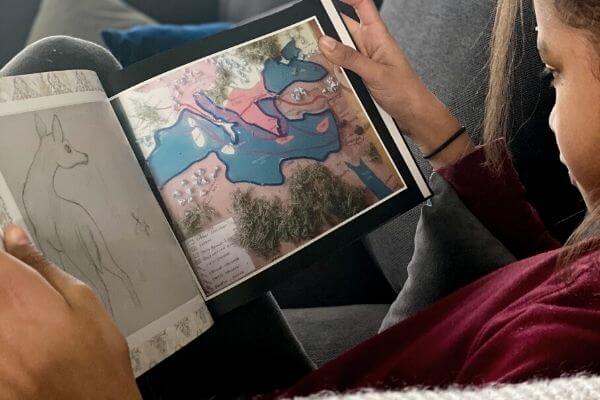
What is the best way to make a photo book for your kids’ art?
At some point along the way, I decided the scrapbooks were too time consuming to make and they still involved me holding onto massive amounts of art until the summer when I would finally have enough time to organize the books (and who really wants to spend their summer doing all that work?)
So, I decided to try something new. I started photographing my kids’ art.
Mostly I tried to do it as they made the art, but sometimes I got behind and had to tackle a big boxful in a weekend. (Again, refer to Pro Tip #2.)
Each Christmas, I would gift them a photobook filled with their art from the previous year. They were delighted to see their own creations commemorated in such an official way.
These books look sleek next to each other on the shelf and take up very little space, but they still give us something to look back on and remember.
To make a photobook of your children’s artwork, all you need to do is photograph it, choose a photobook software, upload your pictures, choose a template (if applicable) and customize it to your preferences. Then order one or more copies.
The process is simple, but again, time consuming. There’s a lot of photo editing involved and you need to be a bit tech savvy to get the books looking the way you want. The results are worth it though!
Pros
- Lasts a long time.
- Looks beautiful.
- Can memorialize tons of different types of art and projects. Can even incorporate photos of your child to make it a personalized record of their year (i.e. a custom yearbook).
- Doesn’t take up a lot of space.
Cons
- Can be very time consuming to take all the pictures, organize them, write captions, and design the layout of the book.
- Sometimes the books can also be expensive depending on what size and quality you order (keep an eye out for coupons from your favorite photobook companies. My favorite is PhotoBook Canada; I’m on their email list and I usually pre-order a bunch of books when they email me about sales and then just redeem my books when I’m ready to go to print).
- Sometimes, it’s just too hard to let go of the actual art projects. For this reason, I still put everything in the photobook, but hold on to the most special items and put them in a physical scrapbook.
Recommended Photobook Software
6. Chatbooks
Using Chatbooks to automate the creation of your photobook
As you may have noticed, I am on a never ending quest to find the easiest way to do things. I use one method for a year or two and as soon as a simpler method comes along, I jump ship and give that a try.
With four kids, I really can’t afford to spend too much time going through all their artwork.
So, when I learned about Chatbooks, a company that will take your Instagram photos and captions and automatically turn them into a photobook, I was intrigued and wondered how I could make this work for simplifying my art storage process.
Here’s the system I came up with. I created a new, private Instagram account. Then I started uploading pictures to it using a simple hashtag system. Each child’s name is a hashtag; we also use #family.
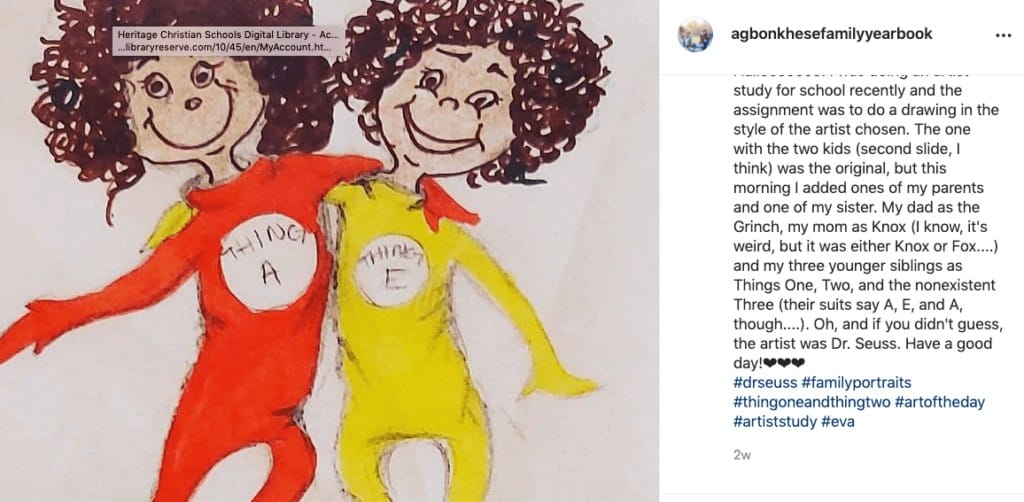
Every time my kids do a cool art project, craft, homeschool activity, field trip, etcetera, I take a picture and upload it to this Instagram account. I write a short caption and I tag each child who was involved with the memory using their name hashtag. I use the family hashtag for anything that’s of interest to the whole family.
At the end of the year, I will order five books from Chatbooks–one for each child and one for our family. It’s easy to sort the pictures in the Chatbooks app using the hashtag filter.
This has removed the need to store any physical pieces of art beyond the most precious and has removed the overwhelming chore of trying to sort through a year’s worth of work in the summer.
Pros
- The same benefits as a digital photobook, but it’s much faster and simpler. You’re captioning the photos every time you upload them and adding hashtags so you can sort them later.
- The photobook design is super simple, so you don’t have to worry about laying out the pages as you would with a custom photobook.
Cons
- If you’re not comfortable using Instagram, there would be a learning curve for you.
- You have to remember to take the photos and upload them periodically so it doesn’t become a huge project.
- It can also be a bit expensive compared to a traditional scrapbook or binder, though the time saved may make up for that. You can find all of their pricing options here.
Visit Chatbooks and use coupon code MYCUPRUNSOVER to get 15% off on your first order.
7. Artkive

Use Artkive to have someone else make your photobook
I have not used this method yet, but I think it’s brilliant.
Artkive is a done-for-you service that turns your children’s art into a custom photobook.
They send you a box, which you fill with your kids’ art and send back to them. They professionally photograph it and turn it into a stunning, keepsake book or framed mosaic.
It’s a bit pricey, but if time is an issue for you and you’re feeling completely overwhelmed, this is a great way to get the art storage task off your plate so you can spend more time making new art!
Pros
- It’s completely done for you. You don’t have to worry about taking photos, editing and organizing them, or laying out a photobook yourself. This is a huge timesaver!
- You get a beautiful book as well as access to the digital files.
Cons
- It’s definitely the most expensive option on the list.
- Again, you’re limited to flat art projects.
I hope that these ideas have helped spark your imagination and given you some ideas about how to store your own kids’ art.
Leave a comment below and let me know how you’re tackling the art storage program and don’t forget to save this post to Facebook or Pinterest so you can find it later.

Sophie Agbonkhese is a writer, homeschooling mother of four, and a recovering overachiever (who occasionally relapses). She is the founder of My Cup Runs Over, a site dedicated to helping busy women simplify and enrich their lives. When she’s not writing or debugging websites, Sophie spends her time reading, dancing, bullet journaling, reading, gardening, listening to audiobooks, and striving fruitlessly to have a clean house for at least five minutes.